Are you finding DIY pop-up easter card ideas? This pop-up card is a must-try for anyone interested in papercraft. When the card is opened, a bunny with an egg appears inside. You can give this cute card with special messages to anyone, especially children, for Easter’s day. Anyone who receives this card may be surprised at the appearance of the bunny inside the card.
It’s not too challenging to make the pop-up card. Let’s make the card follow the instruction below. Includes a tutorial video with a step-by-step guide at the end of the article to help you make the card easier.
Tool and materials to make the DIY pop-up Easter card
You need to grab some craft supplies before making the Easter pop-up card. Some supplies you will need are:
- An Easter pop-up card template (Download the template here)
- Cricut machine, or an art knife
- 160 – 250 gms Card stock (2 white, 1 beige, 1 red) (250gms card stock is the best)
- Glue
- Double-sided tape
How to make the DIY pop-up Easter card
Firstly, download the Easter pop-up card, then cut them with your Cricut machine or an art knife. It’s better to cut the template with your Cricut machine. In case, you don’t have one, you can use an art knife.
Then, open the PDF file in the download folder. It includes the name of each piece of the template. You can write the name of the pieces on each piece with a pencil.
1. How to assemble the bunny with an egg.
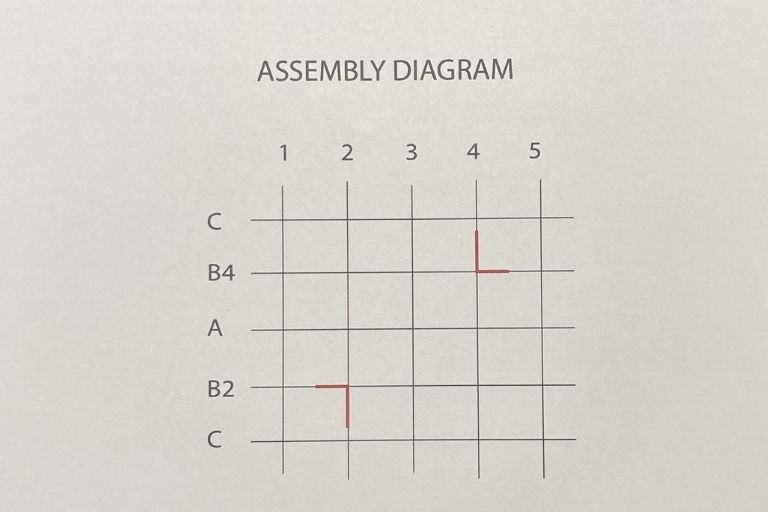
You will find an assembly diagram in the PDF file like this. This diagram shows how to assemble the bunny with an egg.
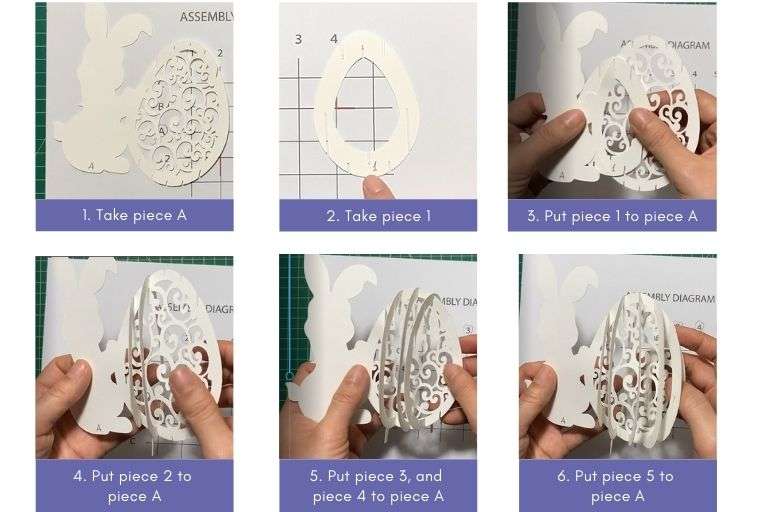
Step 1: Take piece A. Then put piece 1, piece 2, piece 3, piece 4, piece 5 to piece A.
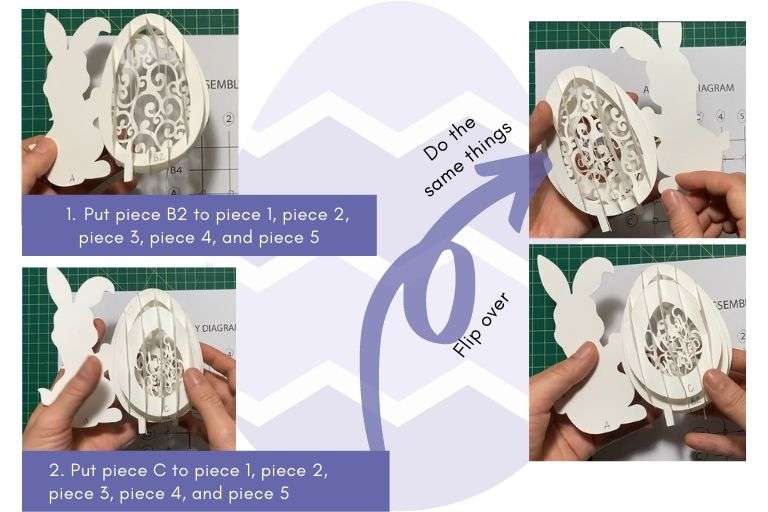
Step 2: Take piece B2. Then put the piece B2 to piece 1, piece 2, piece 3, piece 4, piece 5
Step 3: Take a piece C. Then put the piece C to piece 1, piece 2, piece 3, piece 4, piece 5
Flip the bunny with egg over.
Step 5: Take piece B4. Then put the piece B2 to piece 1, piece 2, piece 3, piece 4, piece 5
Step 6: Take the other piece C. Then put the piece C to piece 1, piece 2, piece 3, piece 4, piece 5
For the step-by-step assembly tutorial, watch more How to make the Easter pop-up card here.
We’ve completed half of the DIY pop-up Easter card process. We’re going to attach the bunny with the egg to the base of the pop-up card.
2. How to attach the bunny with the egg into the base
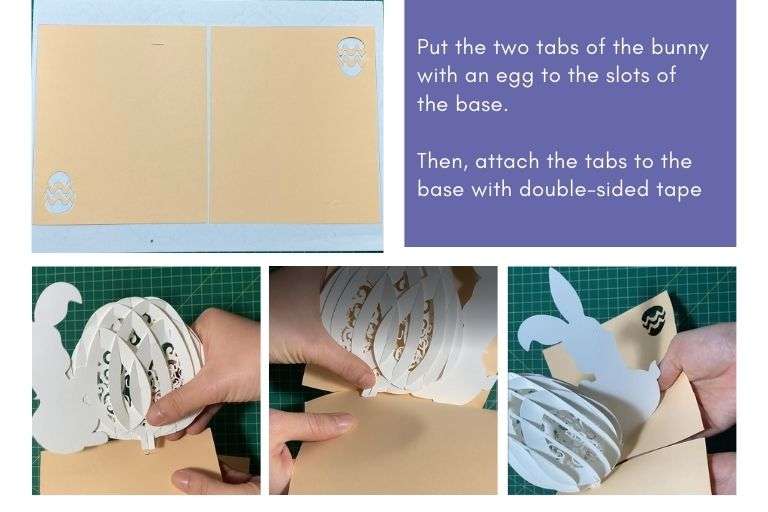
Take the two pieces of the base. As you see, there are two tabs under the bunny with the egg. Put the two tabs into the two slots on the base. Then, we will use double-sided tape to attach the bunny with the egg to the base.
Then, you will have the bunny with the egg like this.
3. How to make a cover of the DIY Easter pop-up card.
Now, we will take the two covers of the card.
Step 1: Fold along the dotted line. Add double-sided tape on the cover.
Step 2: Take the other piece of the cover, then, attach the two pieces of the cover together.
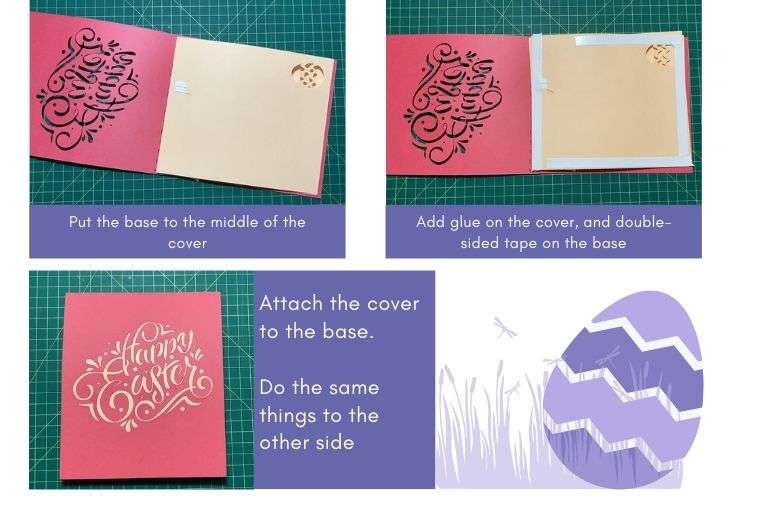
Step 3: Open to cover. Put the base in the middle of the cover. Then, add double-sided tape on the base like this. Then, add some glue on the cover, especially on the text in the cover.
Step 5: Close the cover carefully to attach the cover to the base. Do the same things to the other side
The step-by-step tutorial video
That’s all to make the DIY pop-up easter card. It’s not too challenging, right? Leave your comment to let us know your feeling after making this pop-up card. Hope you have a great time with your friends and family this Easter.

